Whip Up Easy 5-Minute Vegan Coconut Cream for Any Dessert
Imagine a light, airy, and utterly delicious topping that transforms any dessert, coffee, or fresh fruit into an indulgent delight, all without a single trace of dairy. We're talking about how to make fluffy dairy-free coconut whipped cream – a game-changer for vegans, those with allergies, or anyone simply looking for a delightful alternative. What if we told you that achieving this creamy perfection can take as little as five minutes of active preparation? While a little foresight in chilling is essential, the actual whipping process is astonishingly quick and straightforward.
For years, the idea of a truly satisfying dairy-free whipped topping seemed like a culinary unicorn. Store-bought options often fell short, lacking the quintessential fluffiness and rich mouthfeel. Then came coconut whipped cream, bursting onto the scene as a revelation. My own initial attempts, much like many home cooks, were a mix of triumphs and amusing failures – sometimes a perfectly fluffy cloud, other times a slightly grainy, less-than-ethereal mass. But through trial and error, I discovered the simple secrets to consistent success. This article will guide you through every step of how to make coconut whipped cream, ensuring your results are always cloud-like and perfectly delicious, every single time.
Why Choose Coconut Whipped Cream? The Dairy-Free Dessert Game-Changer
Beyond being an excellent dairy-free and vegan alternative, coconut whipped cream offers a unique set of benefits that make it a standout choice for various culinary applications:
- Naturally Vegan & Dairy-Free: It's the perfect solution for anyone avoiding dairy due to allergies, lactose intolerance, or ethical dietary choices.
- Subtle, Delicious Flavor: Unlike some dairy substitutes, coconut cream has a delicate, slightly sweet, and tropical flavor that complements a vast array of desserts without overpowering them. It adds an exotic twist that many find irresistible.
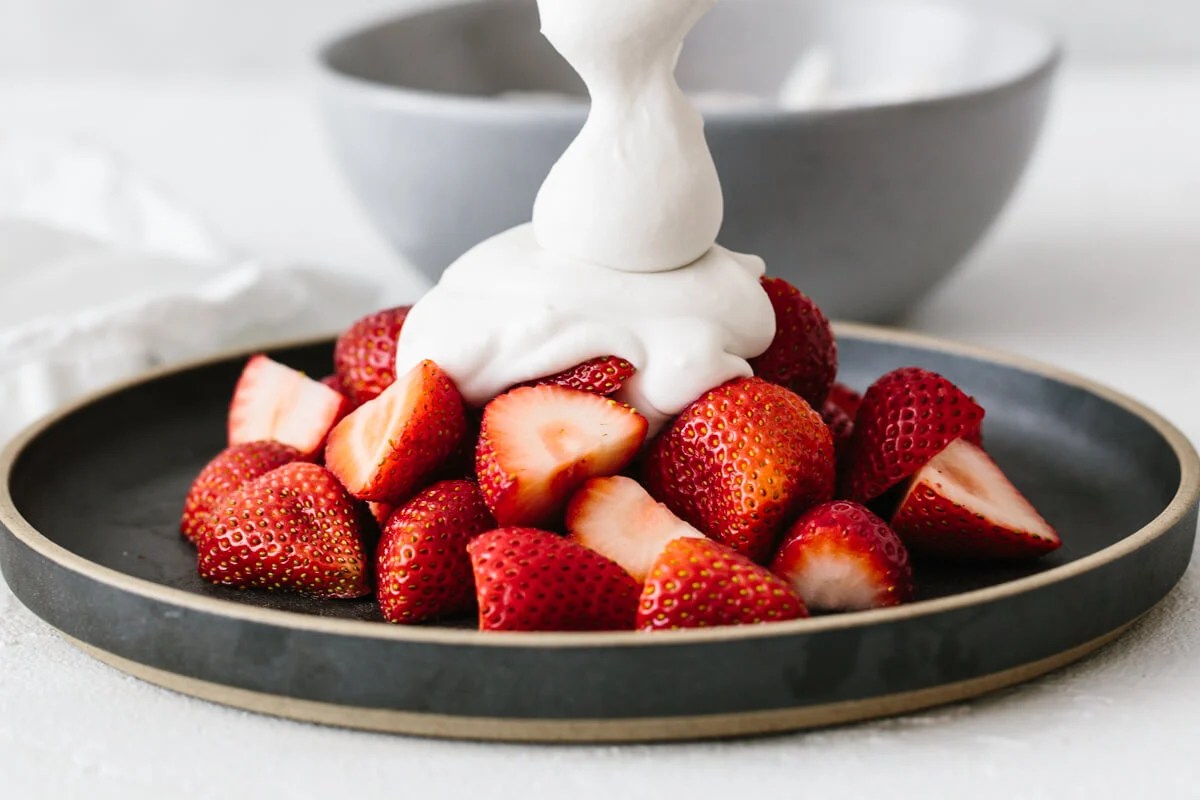
- Incredibly Versatile: From dolloping on fresh berries, pies, and tarts, to swirling into hot cocoa or coffee, or even serving alongside pancakes and waffles, its uses are endless. It's also fantastic as a base for parfaits or trifles.
- Surprisingly Easy to Make: Once you know the tricks, the actual process is incredibly fast. Most of the "work" is simply waiting for your coconut cream to chill properly.
- Wholesome Ingredients: Typically made with just coconut cream, a touch of sweetener, and vanilla, it's a relatively clean-label topping you can feel good about.
Ready to elevate your dessert game? Let's dive into the simple steps to create this dreamy, fluffy topping.
Mastering the Art of Coconut Whipped Cream: A Step-by-Step Guide
Before You Begin: The Secret to Success
The foundation of perfect coconut whipped cream lies in two crucial preparatory steps that cannot be skipped. These ensure your cream achieves maximum volume and stability.
- Choose the Right Coconut Product: This is arguably the most critical step. You absolutely need full-fat coconut cream, not "light" or "reduced-fat" versions, and ideally, one with minimal or no additives. Many brands of full-fat coconut milk will also work, as long as they separate well into a thick cream and a clear liquid. A great tip when grocery shopping is to gently shake the can. If you don't hear much sloshing, it likely contains a good amount of solid cream, indicating it will whip well. Some popular brands known for good results include Thai Kitchen, Aroy-D, and Savoy.
- Chill Your Equipment and Coconut Cream: This is non-negotiable.
- Coconut Cream: Place your can(s) of full-fat coconut cream or milk in the refrigerator for at least 8 hours, but preferably 24 hours. This allows the solid coconut fat to separate from the liquid coconut water and solidify at the top. This cold, solid fat is what we'll be whipping.
- Mixing Bowl and Whisk Attachment: About 10-15 minutes before you plan to whip, place your mixing bowl (preferably metal, as it retains cold better) and whisk attachment (from your stand mixer or hand mixer) in the freezer. Cold equipment helps maintain the cold temperature of the coconut fat, which is essential for trapping air and creating a stable, voluminous whipped cream.
Step 1: Carefully Extracting the Cream
Once your coconut cream is thoroughly chilled, it's time to unleash its potential. Gently open the can, being careful not to shake it. You'll observe a thick, solid layer of cream at the top and a clear, watery liquid at the bottom. Using a spoon, carefully scoop out only the solid, hardened coconut cream into your chilled mixing bowl. Leave all the liquid behind – this is coconut water, which can be saved for smoothies, soups, or other recipes. Even a little bit of the liquid can hinder your whipping efforts.
Step 2: Whipping to Perfection
With your solid coconut cream in the cold bowl, attach your cold whisk. Begin whipping on medium speed. Resist the urge to go full-throttle immediately, as this can splash the cream around. After about 1 minute, you'll notice the mixture starting to fluff up and take on a texture resembling traditional whipped cream. As it thickens, you can gradually increase the speed to medium-high. The magic truly begins here as the fat crystals are aerated, creating that signature light and fluffy texture.
Step 3: Sweeten and Flavor Your Creation
Once the coconut cream starts to look visibly lighter and fluffier, it's time to add your preferred sweetener and flavorings. For best results and the smoothest texture, we recommend using powdered sugar (also known as confectioners' sugar). Start with 2-3 tablespoons for one standard can of coconut cream, along with 1 teaspoon of vanilla extract. Continue to beat for another 1-2 minutes until the mixture becomes truly light, airy, and smooth, forming soft peaks. Soft peaks means that when you lift the whisk, the peak of cream holds its shape but the tip gently curls over. If you prefer a different sweetener, such as maple syrup or agave, add it slowly and in smaller quantities, as liquid sweeteners can sometimes affect the texture. Always adjust to your personal taste.
Step 4: The Crucial Taste Test and Adjustment
Pause your mixer and give your freshly whipped coconut cream a quick taste. Does it need more sweetness? A stronger vanilla punch? Gently fold in a bit more powdered sugar or vanilla extract if desired. This is your chance to customize it perfectly. However, proceed with caution and remember the golden rule: avoid overmixing! Whipping for too long can cause the coconut cream to break down, becoming grainy or even separating into an oily consistency. Stop whipping as soon as you achieve those lovely soft peaks.
Step 5: Serve and Store Your Fluffy Topping
For the absolute best texture and delightful fluffiness, your homemade coconut whipped cream is best served immediately. It truly shines when freshly made. If you have leftovers, you can store it in an airtight container in the refrigerator for up to 1-2 days. Be aware that it may harden slightly or even separate a bit during storage. Should this happen, a quick re-whip with your mixer for 30-60 seconds can often bring it back to its fluffy glory.
Troubleshooting Common Coconut Whipped Cream Woes
Even with the best intentions, sometimes things don't go perfectly. Don't worry, most common issues with how to make coconut whipped cream are easily fixable or preventable.
- Problem: It's Not Whipping Up!
- Solution: The most common culprit is insufficient chilling time for the coconut cream or using a "light" coconut product. Ensure your can has been in the fridge for at least 24 hours and that you're using full-fat cream. Also, check that your bowl and whisk were thoroughly chilled. If it's a warm day, your kitchen temperature might also be a factor.
- Problem: Grainy or Separated Cream
- Solution: This usually indicates overmixing. Once soft peaks form, stop. If it's already grainy, you can try chilling it again for 30 minutes and then giving it a very gentle, short re-whip. Sometimes, adding 1/4 teaspoon of a stabilizer like tapioca starch or arrowroot powder (sifted in) and re-whipping briefly can help bring it back together and prevent future separation.
- Problem: Too Runny
- Solution: This could be due to not chilling the cream long enough, or accidentally scooping some of the coconut water into your bowl. Make sure to only use the solid cream. If it's still too runny, try chilling the mixture for another 30 minutes, then re-whipping. Adding a touch of tapioca starch or arrowroot powder (1/4 tsp per can) can also help firm it up. For more detailed solutions, check out Get Perfect Coconut Whipped Cream: Tips for a Fluffy Topping.
Advanced Tips & Creative Flavor Twists for Your Coconut Cream
Once you've mastered the basic recipe for how to make coconut whipped cream, you can begin to experiment with exciting variations:
- Stabilizers for Extra Durability: For whipped cream that needs to hold its shape longer, especially in warmer environments or for piping, consider adding 1/4 to 1/2 teaspoon of tapioca starch or arrowroot powder along with your sugar. Sift it in to avoid lumps.
- No Fancy Tools? No Problem! While a stand mixer or hand mixer makes the job incredibly easy and fast, you can absolutely make this with a good old-fashioned whisk. Just be prepared for a bit of an arm workout! It might take a bit longer, but the results can be just as satisfying.
- Flavor Variations: Don't limit yourself to vanilla!
- Citrus Zest: Add 1-2 teaspoons of finely grated lemon, lime, or orange zest for a bright, fresh flavor.
- Spices: A dash of cinnamon, nutmeg, cardamom, or pumpkin spice can add warmth and complexity, especially during the fall and winter months.
- Chocolate: Sift in 1-2 tablespoons of unsweetened cocoa powder for a rich chocolate whipped cream.
- Coffee/Espresso: Add 1/2 teaspoon of instant espresso powder for a coffee-infused delight.
- Mint: A few drops of peppermint extract can create a refreshing topping, perfect for chocolate desserts.
- Other Extracts: Almond, rum, or coconut extracts can also add wonderful depth.
- Efficient Prep: Keep a few cans of full-fat coconut cream continuously chilled in your refrigerator. This way, you'll always be ready to whip up a fresh batch whenever a dessert craving strikes or unexpected guests arrive.
Endless Possibilities: Pairing Your Vegan Whipped Cream
The beauty of homemade coconut whipped cream lies in its incredible versatility. It's not just for pies and cakes; it can elevate everyday snacks and breakfasts too!
- Classic Dessert Pairings:
- Dollop generously onto apple pie, pumpkin pie, berry tarts, or chocolate lava cakes.
- Serve alongside fresh berries, sliced peaches, or grilled pineapple for a simple, elegant dessert.
- Top off a dairy-free banana cream pie or a luscious chocolate mousse.
- Breakfast & Brunch Boost:
- Spoon over pancakes, waffles, or French toast instead of traditional whipped cream.
- Stir into oatmeal or overnight oats for a creamy, indulgent texture.
- Add to fruit salads or parfaits for an extra layer of flavor and richness.
- Beverage Enhancer:
- Swirl into hot chocolate, dairy-free lattes, or iced coffee.
- Use as a topping for festive mocktails or smoothies.
The possibilities truly are endless. Whether you’re crafting an elaborate dessert or just want to make your morning coffee a little more special, knowing how to make coconut whipped cream opens up a world of delicious, dairy-free options.
Creating your own vegan coconut whipped cream is a rewarding experience that unlocks a world of delicious, dairy-free possibilities. With just a few simple steps, proper chilling, and the right ingredients, you can consistently achieve a light, fluffy, and incredibly tasty topping in minutes. It's a testament to how easy and accessible dairy-free baking and dessert-making have become. So go ahead, grab that can of full-fat coconut cream, chill your equipment, and prepare to whip up a truly magical topping that will impress everyone. Your desserts (and taste buds) will thank you!
